

This is in part because I use the same basic technical applications with different colors on most of what I do (so it would be somewhat redundant regarding execution), and in part because the process often involves a lot of wet (and drying) paint, there's not always a chance to snap a quick shot.
This is how all the pretty things I've been showing here have started, since I began working this way maybe three years back.
Sketch

So, first thing I do is get the basic colors down, washing them on a white primed model. This essentially means that I'll avoid leaving white (primer) in the recesses, and lets me see if there's anything weird with colors/general composition.
Next, I add the shadows: this is probably what takes the most creativity. The goal here isn't to realistically put the shadows down, but to convincingly and interestingly put them down.
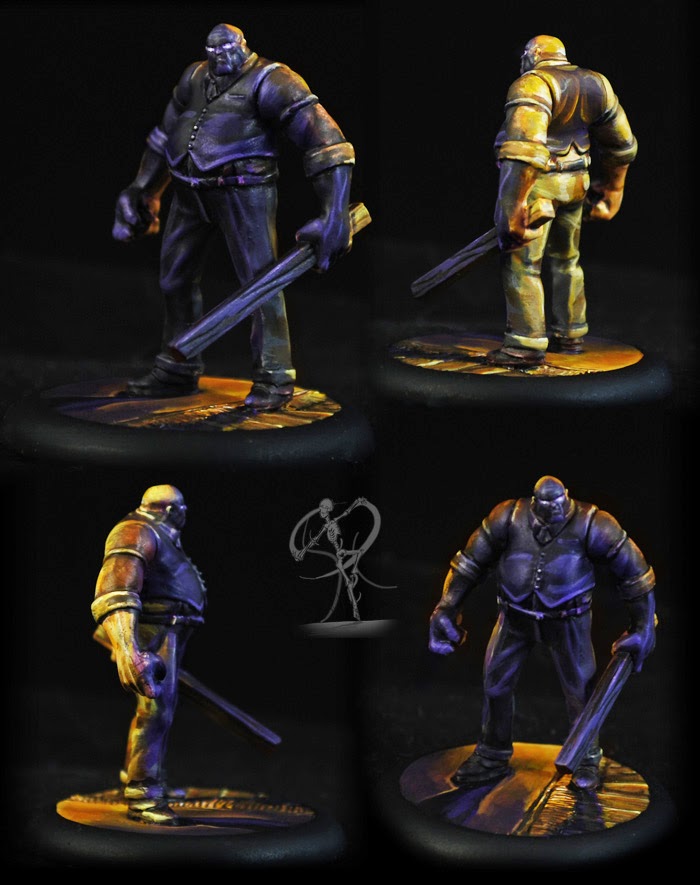
Twisting the model around, the idea is, you can fairly easily see where the light source isn't blocked to a given surface. Where it is blocked is where I put down a blue-grey wash. The important thing here, to reiterate, is making it look good. For instance, the man's face would be in shadow, as would the woman's quiver, but both would make for a less interesting model.
This fulfills the same purpose as the initial colors, darkening areas and making sure the general feel is right. One could skip this step, but I've found that, in the long run, it really protects against a lot of mistakes that are more time consuming to fix later on. This is basically the same as cel shading, in the principle of a decently harsh shadow that's not particularly subtle or sophisticated.
At this point, the model looks like my WIP shot above.
Highlighting
From here, I work on colors, more or less one at a time, starting with the largest surface areas 
I basically follow the same structure as my NMM tutorial, but reversing the two halves (since I find it easier to more clearly define the bright points- if you're confident with shadows first, you could basically follow the same order), in starting with the highlighting rather than shading. So, this would be equivalent to steps 4-7, obviously with color instead of greyscale.
I blend up, adding red-orange, then orange, then yellow-orange, then yellow-orange with a bit of grey. At each step, there's less of the original color until, more often than not, there's none by the time I get to any strong highlights.
The idea here is to move towards the light source, with edges and areas closer to the light source being brighter, but not all the way to white since you don't want the surface the light's cast on to look brighter than the light itself.
The more reflective the surface, the sharper you'll want the highlight, and if it's reflective enough, you can add some highlights the same color as the hot spots on the light source when painting that part (below).
Also, add more red than you feel comfortable with, especially in the initial steps. If you're anything like me, you'll be adding red, and think to yourself "hmm, this is probably too red," and then it'll actually look muddy on the mini, and you'll need to add more to get that strong saturation. A warm brown can also look more natural on the right surfaces if the red is really dominating the initial color.
Option: Other colors
I actually find that colors other than, say, a warm lantern, are easier. With more saturated, less organic colors, I'll add grey, light blue, or yellow to blend up, depending on how strong the color is, but with unnatural colors, it's more forgiving since you're likely mimicking a magic effect, etc., rather than something that needs to look convincingly natural.
I find that teal and magenta tend to have a lot of saturation, which make some cool magic-y effects, while pale blue can make some more ghostly looks.

 Shading
Again, I work from the midtone, this time adding a dark-ish blue-grey blending down. The colors will tend to start around the same tone as the base, maybe a little darker, but a bit desaturated.
Next, for the extra recesses, add more black, and this is when it can bleed in to some of the highlights for recesses with undercuts etc. Skin should have a softer shade under many circumstances, as the same harshness will generally not look good unless you want a craggy face, etc.
Depending, I often re-highlight the shadowed side, bringing the color up to a desaturated midtone so, again, it's about what feels right vs. what it would actually be (half the model in near-black).
Option: Other Colors
Cool colors are generally best. I've enjoyed working in purple as a contrast to orange for extra effect and a more supernatural look.

Light Source
I usually do this last, though sometimes if the entire area around the source is done, I'll do it then.
The type of source makes this vary a bit, but the main trick for me is getting as close to white as I can while still maintaining saturation. I'll start with a relatively bright color, maybe shade a touch around the edges, but mostly focus on getting that extreme highlight, often getting to pure white- if blended subtly, this won't actually look like white, but just a really strong point on the light.
Final Results
What I love about this sort of technique is that it creates a sense of atmosphere, location, and narrative, without needing to create an elaborate (and often impractical) display base.

No comments:
Post a Comment